- Categories
- Multi-copter Set
- Multi-copter controller
- Multi-copter Frame Kit
- Multi-copter Propeller
- Multi-coper Cam Gimbal
- Multi-copter ESC
- Multi-copter Motor
- DIY Accessory
- Spare Parts
- FPV Wireless System
- Flybarless/Gyro system
- RC Airplane
- RC Helicopter
- Helicopter Blades
- Plane Blades/Propeller
- RC Boat
- RC Car
- Servo
- Battery
- Radio Control System
- Balance Charger
- Wire/Line/Silicone Wire
- 3K Carbon Fiber
- Photography Equipment
- Screws/Nuts/Washer
- Adhesive Tapes
Recently Viewed
- Home
- Radio Control System
- Corona 2.4G Receiver
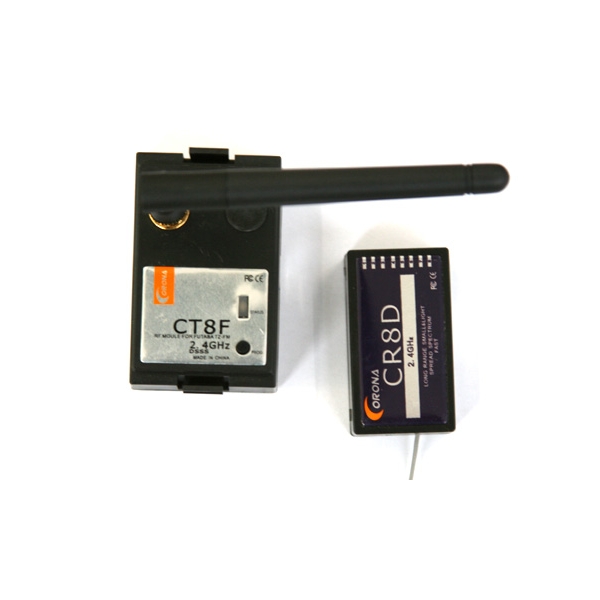
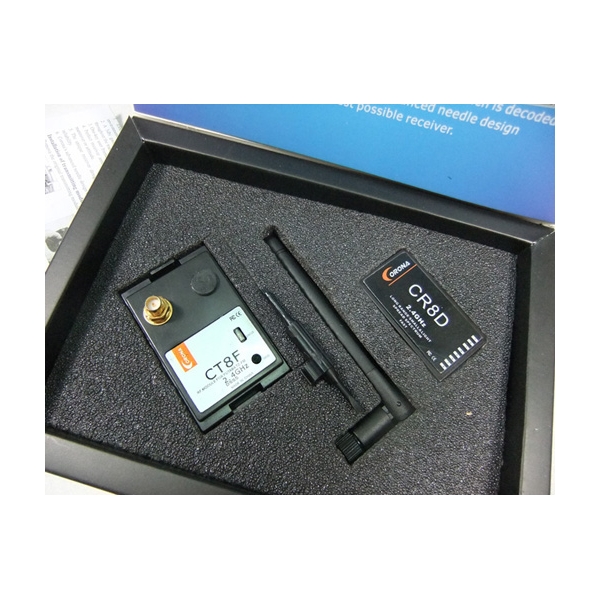
- Corona 2.4GHz 8ch system Corona Compatible Futaba DSSS Module+Receiver Combo - (ITEM NO.: CT8F+CR8D) V2
- Description
- Shipping Methods
-
Corona 2.4GHz 8ch system Corona Compatible Futaba DSSS Module+Receiver Combo - (ITEM NO.: CT8F+CR8D) V2
Type:
Futaba Combo (DSSS) Size:58.5x37.5x22mm(2.3"x1.47"x0.86") Weight:29g Operating voltage:6V-13V Operating current:100mA Output Power:<10mW Resolution:1024 Compatible with:FUTABA: 3PM/3PK/7U/ 8U/ 8J/ 9C / 9Z/ FN series. HITEC: Optic 6/Eclipse 7. WFLY: WFT09 WFT08 Instruction Manual
Corona 2.4GHz Radio Control System:
Thank you for purchasing our Corona 2.4Ghz RF transmitter module & receiver. In order to fully utilize the performance potential of this system, we suggest you first read the manual.Using the Corona 2.4GHz system
1. Our new Corona 2.4GHz transmitter module and receiver are designed to completely eliminate radio interference and glitches which have troubled model hobbyists for years. The software designed exclusively for the transmitting module and receiver instantly locates and assigns safe and protected channels. Other flyers in the area can not create interference that normally would corrupt transmitter signals. The Corona 2.4GHz adheres strictly to Frequency-Hopping Spread Spectrum (FHSS) communication standards by constantly switching across a wide band of frequencies. Combining Corona’s software with FHSS we have designed a transmitter and receiver capable of providing modelers the highest performing radio system available.
Features of Corona 2.4GHz transmitting module and receiver
The new lightweight, advanced technology unit has the following features:
1. Extended operating range 1.5 km range, which has been tested in a real flying environment.2. A 3dbi gain transmitting antenna ensures the wave lengths are evenly distributed throughout the transmitting horizon ensuring the stable signal.
3. One-key user friendly setup mode.
4. Perfect receiver antennas guarantee the plane receives the signal regardless of the maneuver or attitude.
5. The unique receiver design makes the Corona module easy to install and ensures reliability.
6. Corona's advanced needle design ensures the lightest possible receiver
Installation of transmitting module
1. Remove the original transmitting module (See figure 1)


Figure 1 Futaba JR
2. Put the Corona 2.4 G transmitting module into the module port (See figure 2)

Figure 2 Futaba
3. Turn the transmitter power on and check the power indicators (See figure3)


Figure 3 FutabaTransmitting and receiving communication setup
Installation of receivers
As the wave length of 2.4GHz is shorter, its ability to go around obstacles is weaker than receivers whose frequency is below the 100MHz .Therefore, when you install the antenna, you must avoid objects with high conductivity such as; metal parts, servos, ESC’s, battery, wires, and carbon fiber structures. If possible put the end of the antenna outside of the fuselage.Receiver and Transmitter Setup Instructions
By following these steps you will ensure your transmitter and receiver are properly setup and ready to fly.
1. Turn the transmitter on and adjust your transmitter to PPM mode and then turn the transmitter off.
2. Press and hold the programming button on the transmitting module,turn the transmitter on,then you can release the button.(Attention: Not keep hold the button down over 3 seconds,or its ID will change randomly) The LED on Module will flash between red and green indicating the transmitter is ready to bind with the receiver.
3. Press and hold the button on the receiver and power the receiver on. The LED on the receiver will flash two times , indicating the receiver have recognized the transmitter. Turn off the transmitter and receiver.
4.Power on the receiver(s) without pressing any button,then power up the transmitter also without pressing button, the LED on the transmitter light yellow. The RF-link will normally connect in 15~20 seconds between transmitter and the receiver(s).If linked the LED on the receiver(s) will light red without any flash indicating the receiver(s) is operating properly. If the LED flashes sometime or does not light at all. Repeat this step until link is connected properly.After set up receiver and transmitter,user only take the 4th step in normal flying.
We hope you enjoy your new 2.4 Ghz receiver and transmitter modules. They have been designed and produced using the highest quality control measures available. If you have any questions please do not hesitate to contact us or visit our website.
Range checking
This is necessary for safe operation and must be incorporated into your setup and pre-flight operations.Failsafe setting for receiver
When RF linked between transmitter and receiver(LED on receiver light on,and all servos under controll)Caution must be exercised when using the unit in an environment that consists of metal fences, concrete buildings, or rows of trees. In this environment you may experience unexpected radio wave multipath interference.
You must conduct a range check as follows (Note this is done with the receiver out of the plane):1. Place the receivers at least two feet (60cm) above non-metal contaminated ground; for example a wooden bench.
2. Fix the antenna of receiver horizontally. Don’t let antenna touch the ground.
3. Connect a servo to channel one.
4. Place the antenna of the transmitter in a vertical position.
5. Turn on the transmitter and receiver and walk away from receiver while moving the stick which controls channel one. Ask someone to check the distance at which the servo doesn’t respond.
Attention: Controlling distance is greatly related to the transmitter power, please use freshly charged battery packs when you conduct the test. Controlling distance is affected by environment too. Please test it in the open away from any obstacles. The controlling distance in the air is greater than that on the ground. Our controlling range is based on a conservative ground test.Specification:
Specification for the transmitter module CT8FD:
min typ max remark
Operating voltage range 6V 10V 13v Rely on the transmitter
Operating current 100mA
Resolution 10bitSpecification for the Receiver CR8DL:
min typ max remark
Operating voltage range 4.8V 5.0V 6V
Operatint current 30mA
Specified range 1.5km
Resolution 10bit
Latency 22ms
Sensitivity -100dbm*Please take note of the Rx and Tx versions. V1 and V2 are not compatible.


Write Your Reviews
Have any question or inquire for this item? Please contact Customer Service. (Our customer representative will get back shortly.)


